Time: 15 Minutes | Yield: 2 Pizzas
In the landscape of 2026 plant-based eating, the “Nostalgia Reset” is in full swing. We are craving the specific textural experiences of our past—the items that were often discontinued or loaded with processed ingredients—and rebuilding them with functional, high-vibrancy components. The Mexican Pizza is the holy grail of this movement. It is an architectural marvel requiring a precise balance between a rigid foundation and a molten topping. By utilizing the “Crunch-and-Melt” assembly technique, we can achieve this duality in fifteen minutes, creating a high-performance lunch that feels like a decadent treat.
This 15-Minute Vegan Mexican Pizza belongs on your Quick Vegan Lunches board because it utilizes “pantry-power” staples like canned beans and tortillas to create a complex meal with zero long-term prep.
The Science of “Crunch-and-Melt” Architecture
The failure point of most homemade tortilla pizzas is sogginess. The moisture from the beans and sauce quickly compromises the structural integrity of the base. In 2026, we solve this through a multi-stage assembly process.
- The Structural Snap (The Foundation): We do not simply warm the tortillas; we “flash-fry” them in a shallow amount of high-heat oil. This rapidly dehydrates the tortilla, creating a rigid, impermeable barrier. This “snap” is essential for holding the weight of the toppings and providing the necessary textural contrast.
- The Bean Anchor (The Glue): We use seasoned refried beans as the mortar between the two tortilla layers. This high-density paste acts as an anchor, preventing the top tortilla from sliding off while providing a savory, protein-rich core.
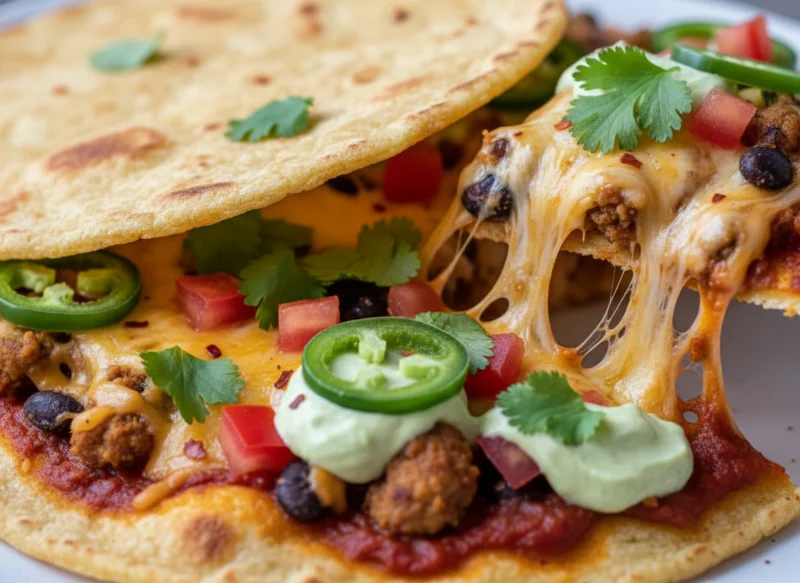
- The Steam-Melt (The Topping): Vegan cheese shreds often dry out before they melt under direct broiler heat. We utilize a “Steam-Melt” technique by covering the pan for the final 2 minutes of cooking. This traps moisture, encouraging the plant-based starches in the cheese to relax and flow into a cohesive, gooey layer without burning the precious crispy base.
Why This Pizza is a 2026 Nutritional Powerhouse
At our kitchen, we focus on “Functional Comfort”—meals that satisfy an emotional craving while fueling the body.
- High-Fiber Satiety: By utilizing beans and whole-grain or corn tortillas, this meal is packed with soluble and insoluble fiber. This ensures a slow, steady release of energy, preventing the post-lunch “food coma” associated with traditional fast food.
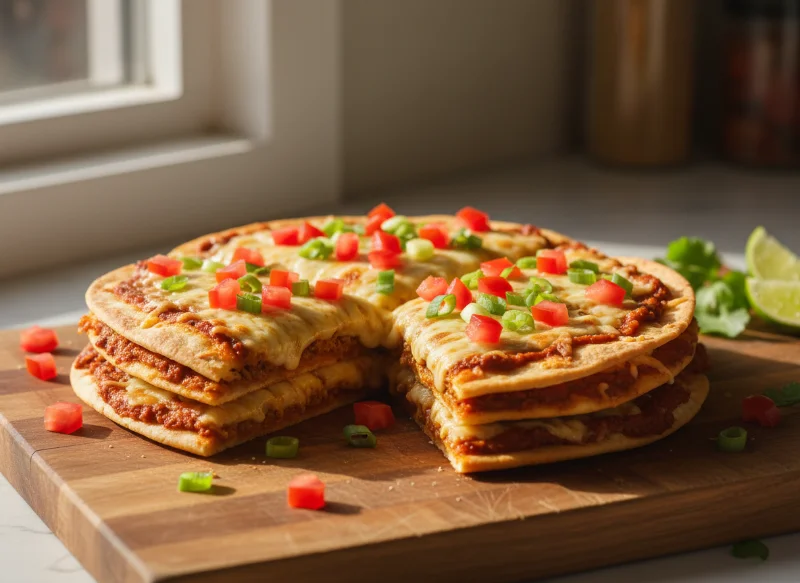
- Lycopene Boost: The concentrated red taco or enchilada sauce, combined with fresh diced tomatoes on top, provides a significant dose of lycopene, a powerful antioxidant known for supporting cellular health.
- Clean Protein Source: Legumes (beans) provide the protein foundation, offering essential amino acids without the saturated fats or cholesterol of traditional meat fillings.
Ingredients & Substitutions Guide
- 4 Small Flour or Corn Tortillas: (Corn will yield a crunchier, more authentic 2026 texture).
- 1 Can (15 oz) Vegan Refried Beans: (Black or pinto beans work; ensure no lard is used).
- 1/2 Cup Red Taco Sauce or Enchilada Sauce: The zesty flavor driver.
- 1 Cup Vegan Cheddar or Mexican Blend Shreds: For the molten top.
- 2 tbsp Neutral Oil: For “flash-frying” the tortillas.
- 1/2 Cup Fresh Tomatoes: Finely diced.
- 2 Green Onions: Thinly sliced for a sharp, fresh finish.
Step-by-Step Instructions
1. The Shell Crisp (Step 1 of 5): Heat the oil in a small skillet over medium-high heat. One at a time, fry the tortillas for about 45-60 seconds per side until they are golden brown, rigid, and puffed in spots. Transfer to a paper towel to drain excess oil. Crucial: They must be crispy!
2. The Anchor Layer (Step 2 of 5): While the tortillas cool slightly, quickly warm your refried beans in a small pot or microwave. Place two fried tortillas on a baking sheet (or back in a large dry skillet). Spread a generous layer of warm beans over these base tortillas.
3. The Second Story (Step 3 of 5): Place the remaining two fried tortillas on top of the bean layer, creating a sandwich. Press down gently to secure them.
4. The Sauce & Cheese Stack (Step 4 of 5): Spread the red taco sauce evenly over the top tortillas. Sprinkle generously with the vegan cheese shreds.
5. The Steam-Melt (Step 5 of 5): If using an oven: Broil on high for 2–3 minutes, watching closely, just until the cheese is melted. If using a skillet (faster): Place the skillet over medium heat and cover immediately with a tight-fitting lid. Let it cook for 3 minutes. The trapped steam will melt the cheese rapidly.
6. Serve: Remove from the heat. Top immediately with diced tomatoes and sliced green onions. Slice into quarters with a pizza cutter and serve hot.
Expert Tips for Success
- The “Double-Decker” Hack: For an extra-hungry day, add a layer of seasoned plant-based crumbles mixed into the refried beans for even more protein.
- Sauce Booster: If your taco sauce feels flat, whisk in a half-teaspoon of cumin and a squeeze of lime juice before spreading it to wake up the flavors.
- Batch Crisp: You can fry all your tortillas on Sunday and store them in an airtight container. When ready for lunch, simply assemble and broil/steam to melt the cheese in under 5 minutes.
- Storage: This recipe is best eaten fresh for maximum crunch. However, leftovers can be reheated in an air fryer at 350°F for 4 minutes to restore some of the texture.
Conclusion
You don’t need to wait for a limited-time menu return to enjoy the satisfying snap and savory melt of a Mexican Pizza. This 15-Minute Vegan version proves that with smart 2026 techniques—like the “Crunch-and-Melt” assembly—you can reclaim a classic and make it a functional, delicious part of your plant-based life.
Is this crispy, cheesy stack going to be your new 15-minute favorite? Let us know in the comments—do you prefer red sauce or green sauce? Don’t forget to save this pin to your Quick Vegan Lunches board for your next high-speed miracle!