Time: 15 Minutes | Yield: 2 Servings
In the fast-moving world of 2026 plant-based nutrition, we are seeing a shift away from “imitation” proteins and a return to the “Grain-to-Grain” philosophy. This movement celebrates the natural synergy of ancient grains and legumes to provide a complete amino acid profile without the need for processed additives. At our kitchen, we believe that the most satisfying bowls are those that provide a “textural landscape”—the soft fluffiness of quinoa paired with the explosive crunch of a perfectly roasted chickpea.
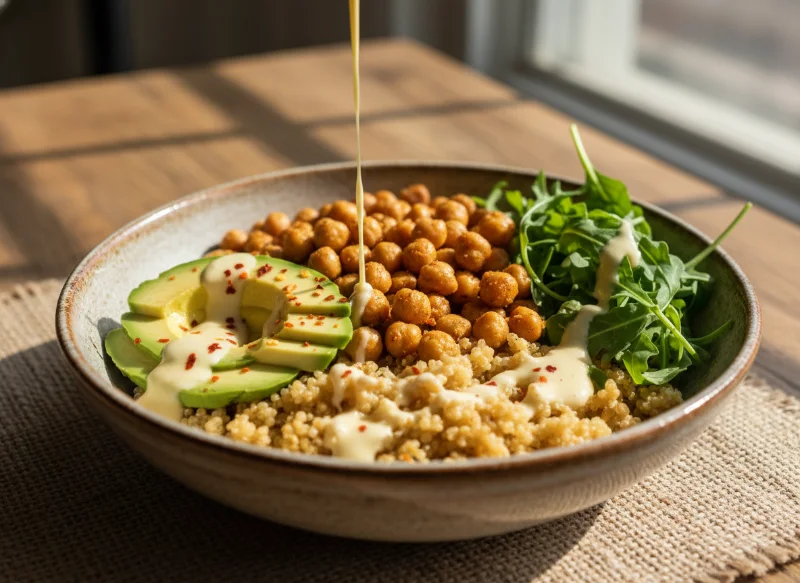
This 15-Minute High-Protein Quinoa & Roasted Chickpea Bowl is the definitive recipe for the performance-focused vegan. It solves the biggest hurdle of the grain bowl: the prep time. By utilizing pre-cooked quinoa and a high-heat skillet “roast” for the chickpeas, you can assemble a nutritionally complete, restaurant-quality bowl in exactly fifteen minutes.
The Science of the “Skillet-Roast”
Traditionally, getting chickpeas “roasted” requires 30–40 minutes in an oven. In our high-speed version, we use the Skillet-Roast method to achieve the same result in 10 minutes.
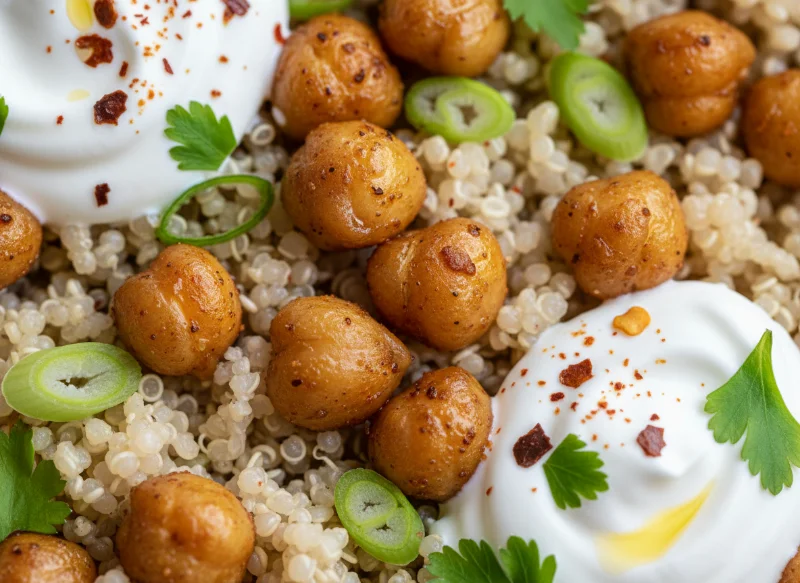
- The Surface Sear: By using a dry, hot skillet (or a tiny bit of high-smoke-point oil), we subject the chickpeas to direct conductive heat. This causes the skins to blister and crisp almost instantly, creating a “roasted” texture while the interior remains buttery and soft.
- The “Grain” Glue: Quinoa is unique among grains because it contains all nine essential amino acids. By using pre-cooked, steamed quinoa (a 2026 pantry staple), we ensure that the base of our bowl is ready the moment the chickpeas are done, preserving the heat and the texture.
- The Tahini Emulsion: We finish the bowl with a 60-second lemon-tahini drizzle. The healthy fats in the tahini don’t just add flavor; they help your body absorb the fat-soluble vitamins (like Vitamin K and A) found in the accompanying greens.
Why This Bowl is a 2026 Nutritional Powerhouse
At our kitchen, we focus on “Functional Satiety”—meals that keep you full and mentally sharp for hours.
- Complete Protein Profile: The combination of quinoa and chickpeas ensures you are getting a high-density, complete protein source, essential for muscle repair and metabolic health.
- Soluble Fiber for Gut Health: Chickpeas are rich in raffinose, a fiber that feeds the good bacteria in your gut, while quinoa provides the bulk needed for healthy digestion.
- Clean Energy: Unlike simple carbohydrate meals, this bowl provides a slow, steady release of glucose into the bloodstream, meaning no “afternoon crash” and sustained focus for your day.
Ingredients & Substitutions Guide
- 1.5 Cups Pre-Cooked Quinoa: (Microwavable pouches or pre-batched).
- 1 Can (15 oz) Chickpeas: Drained, rinsed, and patted bone-dry.
- 1 tbsp Olive Oil: For the skillet roast.
- 1 tsp Smoked Paprika & 1/2 tsp Cumin: To provide that earthy “roasted” flavor.
- 1/4 Ripe Avocado: Sliced, for healthy fats.
- 1 Cup Fresh Arugula or Baby Spinach: For a peppery green lift.
For the 60-Second Lemon-Tahini Drizzle:
- 2 tbsp Runny Tahini: The creamy base.
- 1 tbsp Lemon Juice: For zesty acidity.
- 1 tsp Maple Syrup: To balance the tahini’s bitterness.
- 1-2 tbsp Warm Water: To reach a pourable consistency.
Step-by-Step Instructions
1. The Skillet Roast (Step 1 of 5): Heat the olive oil in a large skillet over medium-high heat. Add the chickpeas and sprinkle with smoked paprika, cumin, and salt. Sauté for 8–10 minutes, tossing frequently, until the chickpeas are golden-brown and the skins have started to “pop” and crisp.
2. The Quinoa Reset (Step 2 of 5): If using a pre-cooked pouch, microwave the quinoa for 90 seconds. If using cold pre-batched quinoa, you can toss it into the skillet with the chickpeas for the final 2 minutes to warm it through.
3. The Zesty Drizzle (Step 3 of 5): While the chickpeas crisp, whisk together the tahini, lemon juice, maple syrup, and warm water in a small jar or bowl until smooth and creamy.
4. The Fresh Component (Step 4 of 5): Wash your greens and slice the avocado. Prepare any other fresh toppings you have on hand, such as cucumber or cherry tomatoes.
5. Assemble (Step 5 of 5): Divide the warm quinoa into two bowls. Top with a heavy serving of the “roasted” chickpeas. Add your greens and avocado to the side.
6. Serve: Drizzle the lemon-tahini sauce over everything. Garnish with red pepper flakes or sesame seeds for an extra hit of flavor and texture.
Expert Tips for Success
- Dry the Chickpeas: We can’t say it enough—moisture is the enemy of the crunch. Pat those chickpeas until they are bone-dry before they hit the pan.
- Seasoning Hack: Add the spices in the last 2 minutes of sautéing to prevent the paprika from burning, which can make the bowl taste bitter.
- The “Cool” Factor: If you’re using this for meal prep, keep the sauce and the avocado separate. The chickpeas will stay crunchy if stored in an airtight container at room temperature for a day, or they can be re-crisped in a pan for 2 minutes.
- Double the Batch: This is a Vegan Meal Prep for Beginners favorite because it holds up so well. Make double the quinoa and chickpeas on Sunday for easy lunches all week.
Conclusion
A high-performance, protein-packed meal doesn’t have to be a project. This 15-Minute High-Protein Quinoa & Roasted Chickpea Bowl proves that with a few smart techniques—like the skillet roast and utilizing pre-cooked grains—you can create a vibrant, plant-based masterpiece that fuels your body and satisfies your soul.
Is this crispy, protein-rich bowl going to be your new post-workout favorite? Let us know in the comments! Don’t forget to save this pin to your High-Protein Vegan Recipes board for your next 15-minute miracle!